Keyframe Editor
Create complex, precisely-timed animations using keyframes.
What are Keyframes?
Keyframes define specific property values at specific points in time. PinePaper automatically animates (interpolates) between keyframes to create smooth transitions.
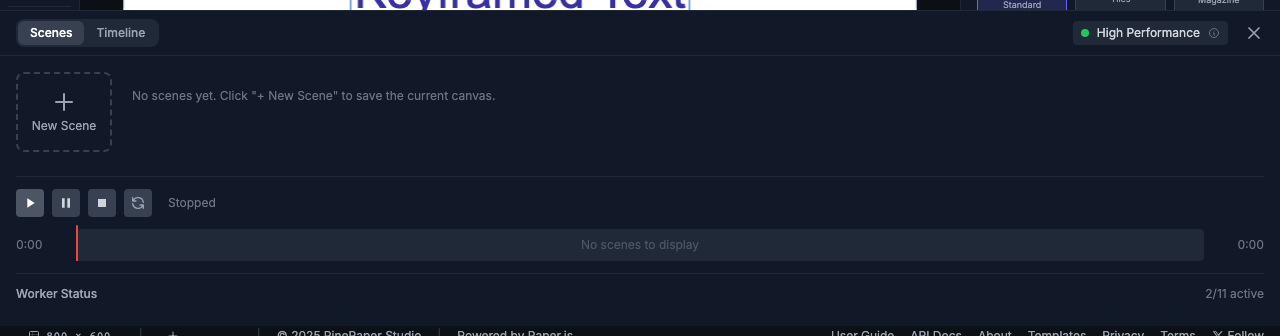
Opening the Timeline
The Timeline panel is at the bottom of the screen. If hidden:
- Click View in the menu
- Select Show Timeline
Creating Keyframes
Method 1: Properties Panel
- Select an item
- Set the playhead to the desired time
- Change a property (position, scale, opacity, color)
- A keyframe is automatically created
Method 2: Timeline Panel
- Select an item
- Click on the timeline at the desired time
- Click Add Keyframe or press K
Keyframeable Properties
| Property | Description |
|---|---|
| Position | X, Y coordinates |
| Scale | Size (uniform or X/Y) |
| Rotation | Angle in degrees |
| Opacity | Transparency (0-1) |
| Fill Color | Item color |
| Font Size | Text size (text items only) |
Editing Keyframes
Moving Keyframes
Drag a keyframe left or right on the timeline to change its time.
Editing Values
- Click on a keyframe to select it
- Modify values in the Properties Panel
- Changes apply to that keyframe
Deleting Keyframes
- Select the keyframe
- Press Delete or right-click → Delete Keyframe
Easing Functions
Control the acceleration of animations between keyframes:
| Easing | Description |
|---|---|
| Linear | Constant speed |
| Ease In | Slow start, fast end |
| Ease Out | Fast start, slow end |
| Ease In-Out | Slow start and end |
| Bounce | Bouncy finish |
Playback Controls
| Control | Shortcut | Action |
|---|---|---|
| Play/Pause | Space | Toggle playback |
| Go to Start | Home | Jump to beginning |
| Go to End | End | Jump to end |
| Split clip | S | Split the keyframe clip under the playhead |
Trim and Split
Each keyframe-animated item appears on the timeline as a draggable clip block (the indigo bar behind the keyframe diamonds). The clip block lets you:
- Drag the body — shift the entire animation in canvas time (
timeOffset). - Drag the left edge — trim the start of the played sub-range. The right edge of the bar stays anchored, matching the Premiere/Canva convention.
- Drag the right edge — trim the end of the played sub-range, clamped to the last keyframe’s time.
- Press S with the playhead inside the clip — split at the playhead. The new piece becomes its own registry entry; chaining splits produces N+1 independent pieces.
Data fields
The clip-block UI maps to these fields on the item:
| Field | Meaning |
|---|---|
timeOffset |
Canvas time at which the clip starts |
clipInPoint |
First keyframe-data time the clip plays (defaults to 0) |
clipOutPoint |
Last keyframe-data time the clip plays (defaults to last keyframe time) |
Outside the clip’s canvas window the item is hidden via visible=false — opacity is left alone so opacity-animating keyframes still work inside the window.
// Programmatic equivalent of right-edge trim.
const item = app.create('text', {
  content: 'Reveal', x: 400, y: 300,
  animationType: 'keyframe',
  timeOffset: 2,        // clip starts at canvas time 2s
  clipInPoint: 1,       // skip the first 1s of keyframe data
  clipOutPoint: 4,      // stop at 4s of keyframe data → 3s clip window
  keyframes: [
    { time: 0, properties: { opacity: 0 } },
    { time: 1, properties: { opacity: 1 } },
    { time: 4, properties: { opacity: 0.3 } },
  ],
});
What split gives you
The split is a deep copy. The Paper.js item is cloned via Item.clone() (preserves transform + style); the keyframe arrays (keyframes, contentKeyframes, propertyEasings) are JSON round-tripped so each piece owns its data. Chaining splits scales linearly: N splits ⇒ N+1 independent pieces, each its own registry entry. Practical consequences:
- Per-piece easing — change a single keyframe’s
easingon one piece; the others are untouched. - Per-piece color or value interpolation — edit a keyframe’s
fillColor,strokeColor, or any animated property on one piece to apply a different transformation over its window. The existing color and gradient interpolators handle HSL/RGB lerp unchanged. - Per-piece spatial path —
spatialHandleslive inside individual keyframes, so curving the path of one piece’s animation doesn’t affect the others.
Pieces don’t visually overlap as long as their canvas windows don’t overlap. Drag any piece to a new canvas-time position, trim it again, or split it further.
Example: Fade In Animation
- Select a text item
- At time 0s: Set Opacity to 0
- At time 1s: Set Opacity to 1
- Set easing to Ease Out
- Press Play to preview
Example: Color Transition
- Select an item
- At time 0s: Set Fill Color to #FF0000 (red)
- At time 2s: Set Fill Color to #0000FF (blue)
- The color smoothly transitions through the spectrum
Example: Camera Pan Effect
Create cinematic pan animations across large images using the canvas as a viewport.
How It Works
When you have an image larger than your canvas:
- The canvas bounds act as the camera viewport
- Moving the image left = camera pans right
- Moving the image up = camera pans down
Creating a Pan Animation
- Set canvas size to your desired output (e.g., 1920×1080 for HD video)
- Import a large image (larger than canvas)
- Position the image so the starting view is visible
- Create keyframes to move the image position
Row-by-Row Scanning Pattern
To scan across an image in a serpentine pattern:
| Time | Image X | Image Y | Camera Effect |
|---|---|---|---|
| 0s | 0 | 0 | Top-left corner |
| 2s | -1920 | 0 | Pan right across row 1 |
| 2.5s | -1920 | -200 | Move down |
| 4.5s | 0 | -200 | Pan left across row 2 |
| 5s | 0 | -400 | Move down |
| 7s | -1920 | -400 | Pan right across row 3 |
Alternative: Camera Follows
For dynamic camera movement that follows an object:
- Create a small marker or path
- Add a
camera_followsrelation to the marker - Animate the marker position
- The viewport automatically follows
Camera Pan Tips:
- Use Ease In-Out for smooth, cinematic movement
- Keep pan speed consistent for professional results
- Export as MP4 or WebM for best quality
Tips
Keyframe Tips:
- Use fewer keyframes for smoother animations
- Ease In-Out creates natural-looking motion
- Preview often to check timing
Performance: Very complex keyframe animations (many items, many keyframes) may affect export performance.