Blending
The blending system controls how items visually composite with items beneath them. Apply presets for instant effects, transition between blend modes over time, or create interactive blending that responds to user actions.
Blend Presets
Apply a visual preset with one click for instant compositing effects:
| Preset | Blend Mode | Opacity | Visual Effect |
|---|---|---|---|
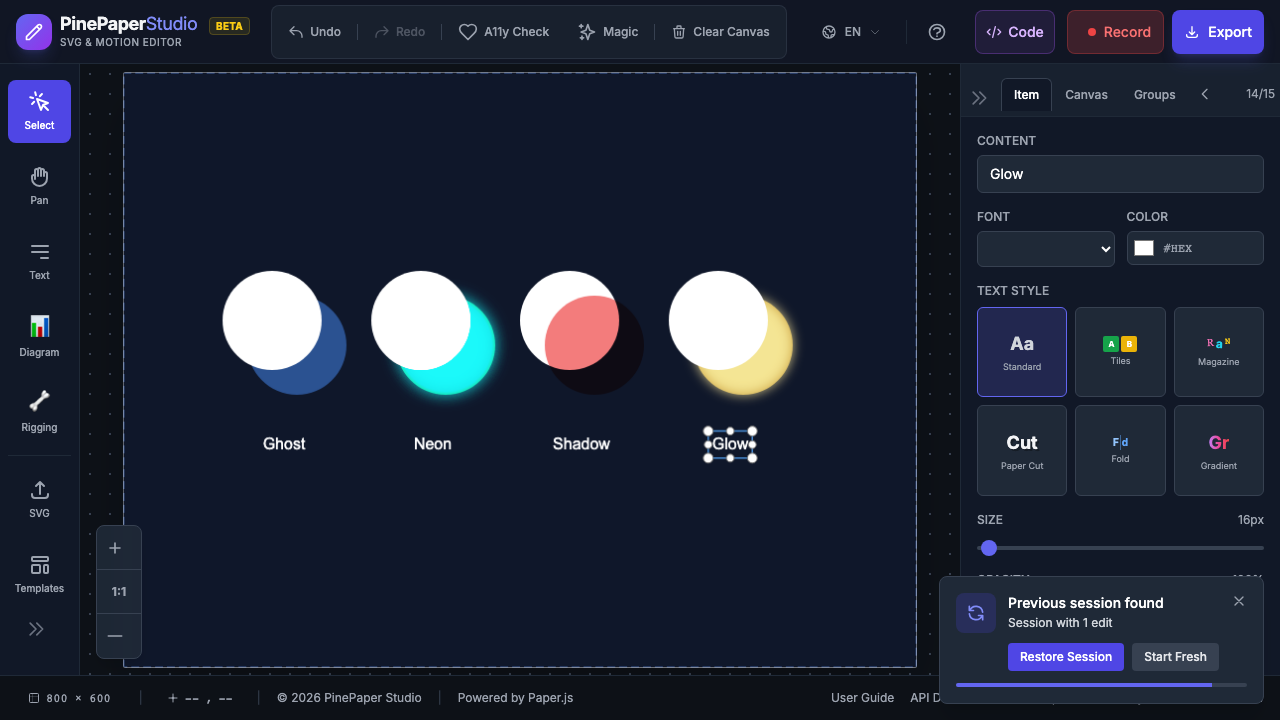
| Ghost | Screen | 100% | Ethereal, translucent appearance |
| Neon | Color Dodge | 100% | Bright, glowing neon sign |
| Shadow | Multiply | 100% | Dark shadow cast |
| Glow | Screen | 100% | Soft additive glow |
| X-Ray | Difference | 100% | Inverted X-ray look |
| Dreamy | Soft Light | 100% | Soft, hazy atmosphere |
| Vintage | Overlay | 100% | Warm, aged aesthetic |
| Silhouette | Source In | 100% | Solid shape cutout |
| Knockout | Source Out | 100% | Inverse mask effect |
| Ink Wash | Multiply | 100% | Light watercolor wash |
| Hologram | Color Dodge | 100% | Sci-fi holographic |
| Ember | Hard Light | 100% | Warm, fiery glow |
| Frost | Screen | 100% | Cold, icy transparency |
| Noir | Luminosity | 100% | Black-and-white film |
| Pop Art | Exclusion | 100% | Bold color inversions |
| Stained Glass | Color Burn | 100% | Deep saturated tones |
| Duotone | Hue | 100% | Two-tone color effect |
| Cinematic | Soft Light | 100% | Film color grading |
| Blueprint | Difference | 100% | Technical drawing look |
Applying a Preset
- Select the item you want to blend
- In the Properties panel, find the Blending section
- Choose a preset from the dropdown
- The blend mode and opacity are applied instantly
To remove a preset, select Normal to restore the default blend mode.
How Blend Modes Work
Blend modes control how an item’s colors combine with what’s beneath it:
| Mode | Effect | Best For |
|---|---|---|
| Normal | No blending (default) | Standard items |
| Multiply | Darkens - colors multiply together | Shadows, darkening |
| Screen | Lightens - inverse multiply | Glows, light effects |
| Overlay | Contrast boost - multiply + screen | Color grading, texture |
| Darken | Keeps darker pixels | Subtle darkening |
| Lighten | Keeps lighter pixels | Subtle lightening |
| Color Dodge | Brightens dramatically | Neon, intense highlights |
| Soft Light | Subtle contrast adjustment | Dreamy, soft effects |
| Difference | Color inversion based on values | X-ray, artistic effects |
Blend Mode Transitions
Smoothly transition between blend modes over time:
- Select an item with a blend mode applied
- Choose the target blend mode
- Set the transition duration
- The item smoothly cross-fades between modes
This is useful for creating mood changes, day-to-night transitions, or dramatic reveals.
Interactive Blending
Make blend modes respond to user interaction:
| Event | Behavior |
|---|---|
| Hover | Blend mode changes when mouse enters/leaves |
| Click | Blend mode toggles on click |
For example, items can appear ghostly by default and become solid when hovered - perfect for interactive presentations and menus.
Group Blending
Apply blend modes to entire groups:
- Select a group of items
- Apply a blend mode to the group
- Optionally enable Cascade Opacity to apply opacity to all children
Group blending treats the entire group as a single composited element before blending with the background.
Proximity-Based Blending
Items can change blend modes based on how close they are to other items:
- As items move closer together, their blend modes transition
- Creates dynamic, responsive visual effects
- Great for interactive scenes where items influence each other
Tip: Combine blend presets with the Relations system. Use the blend_reacts_to relation for proximity-based blending, or blend_transition for automatic time-based blend cycling.
Tips
- Start with presets - Try the 19 built-in presets before creating custom blends
- Layer order matters - Blend modes affect how items combine with items below them
- Use with dark backgrounds - Screen and Color Dodge work best on dark backgrounds
- Combine with opacity - Adjusting opacity alongside blend mode creates subtler effects
- Preview in motion - Some blend effects look different when items are animated
Related: Effects | Relations | Animations